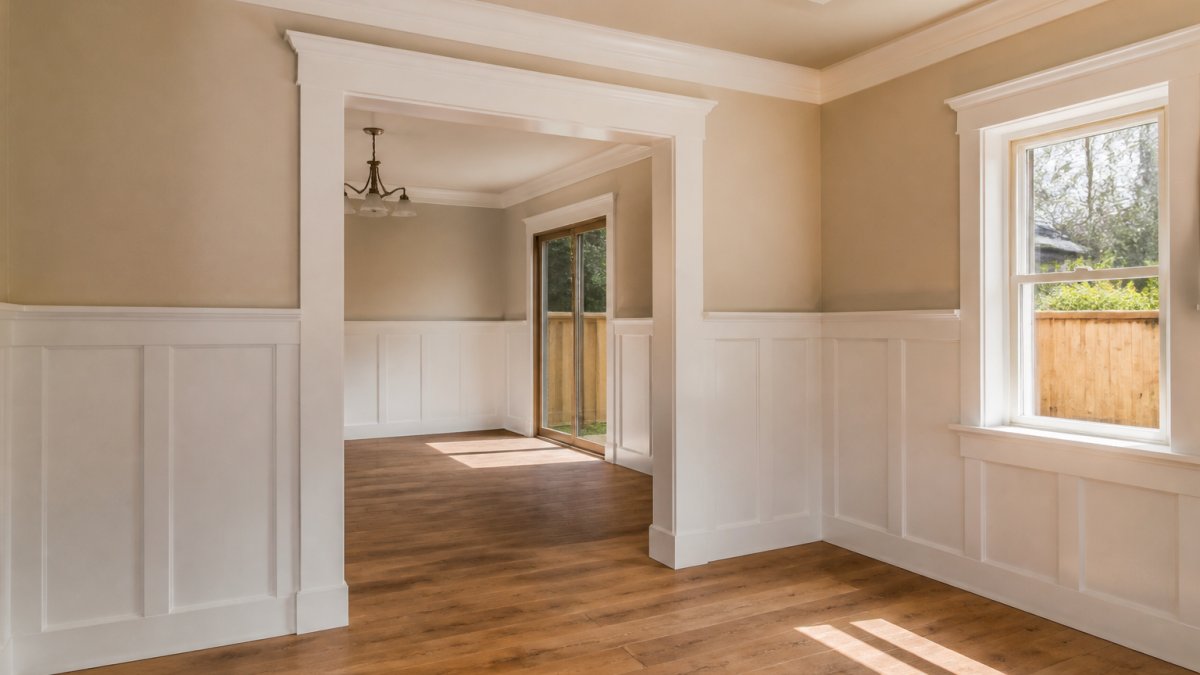
Craftsman Home Renovation Trim Tips: A Practical Guide
Table of Contents
- Understanding Craftsman Trim: What Makes It Authentic
- Identifying and Preserving Original Craftsman Features
- How to Install Craftsman Trim: Materials and Preparation
- Craftsman Door and Window Casing: Installation Steps
- Restoring Original Wood Trim: Repair and Finishing
- Essential Craftsman Trim Tools and Equipment
- Common Mistakes to Avoid in Craftsman Trim Renovation
- Planning Your Craftsman Trim Project: Timeline and Next Steps
- Frequently Asked Questions
Last Updated: October 5, 2026
Understanding Craftsman Trim: What Makes It Authentic
Craftsman home renovation trim is the detailed woodwork that defines the character of homes built between 1905 and 1930. At Schatz Construction, we understand what makes it special: thick solid wood, hand-planed surfaces, and proportions that feel right to the human eye.
The key difference between authentic Craftsman trim and modern trim comes down to materials and design. Original trim used quarter-sawn oak, Douglas fir, or other solid hardwoods. Today's builders often use finger-jointed pine or MDF. That matters because solid wood ages beautifully, takes stain and paint differently, and lasts generations.
Key Characteristics of Craftsman Woodwork
Authentic Craftsman woodwork shares distinct visual and structural traits. The trim typically features:
- Wider boards (often 6-12 inches instead of 3-4 inches)
- Hand-planed or machine-planed surfaces with visible grain
- Tapered columns on porches and built-ins
- Recessed panels in doors and wainscoting
- Simple, honest joinery without excessive ornamentation
- Natural finish or earthy paint colors
The style emphasizes visible craftsmanship. You can see the joinery. Nails are often exposed and part of the design. Baseboards sit higher on the wall. Window casings extend further into the room. These details aren't decorative extras, they're fundamental to how Craftsman homes were built.
Why Original Trim Matters to Your Home's Value
Keeping original trim protects your home's historical integrity and market appeal. Homes with intact original woodwork command higher resale prices. Buyers who appreciate Craftsman architecture specifically seek homes where that character has been preserved.
Beyond resale value, original trim tells the story of your home. It shows the skill of the craftspeople who built it. When you restore rather than replace that trim, you're maintaining a connection to the past while improving your living space today.
Identifying and Preserving Original Craftsman Features
Not every home has original trim in every room. Kitchens and bathrooms were often updated over the decades. Knowing what you're working with helps you make smart restoration decisions.
Signs of Original vs. Replacement Trim
Original trim has distinctive characteristics. Look for these clues:
- Grain patterns: Original wood shows varied grain. Modern trim often looks uniform.
- Nail holes: Original trim has hand-driven nails, often slightly offset. Replacement trim has evenly spaced nail holes.
- Thickness: Original trim is thicker and heavier. Modern trim feels thinner and lighter.
- Joinery: Original corners use mortise and tenon joints or simple butt joints. Replacement trim often uses pocket holes or biscuits.
- Paint layers: Multiple paint layers suggest original trim. Single smooth paint suggests recent installation.
- Wear patterns: Original trim shows wear consistent with age, dents, scratches, and minor damage that follows a natural pattern.
Run your hand along the trim. Original wood feels slightly irregular. Modern trim feels uniform and smooth.
When to Restore Rather Than Replace
But the decision should consider your home's character and your long-term plans.
Restore original trim when:
- The structure is sound (no rot, major cracks, or insect damage)
- You plan to stay in the home long-term
- The trim is visible in main living areas
- Your home's value depends on Craftsman authenticity
Replace trim when:
- Damage is extensive (more than 30% of a board is compromised)
- The trim is in a utility space where character matters less
- You're updating a kitchen or bathroom with modern functionality
- Repair costs are significantly high
How to Install Craftsman Trim: Materials and Preparation
Installing new craftsman home renovation trim requires the right materials and careful planning. The difference between a professional-looking installation and an amateur one often comes down to preparation.
Choosing Authentic Materials
Material choice sets the tone for your entire project. Authentic Craftsman trim uses solid wood, not engineered alternatives.
Best woods for Craftsman trim:
- Oak: Quarter-sawn oak has distinctive ray fleck. It's durable and takes stain well.
- Douglas fir: Warm color, straight grain, and moderate price. Common in original trim.
- Maple: Hard and dense. Takes fine detail well.
- Cherry: Rich color that deepens with age. Expensive but beautiful.
- Reclaimed wood: Original-era boards salvaged from old buildings. Most authentic but costly.
Avoid finger-jointed pine for visible trim. It's cheaper but looks modern and doesn't age like solid wood.
Wood species affects your finish options. Oak accepts dark stains beautifully. Douglas fir looks best with natural finish or light stain. Maple stains unevenly unless conditioned first.
Measuring and Planning Your Trim Layout
Proper measurement prevents costly mistakes. Start by mapping your room carefully.
Take measurements at multiple points. Walls aren't always square or straight. Measure from the floor to the ceiling at the corner, center, and opposite corner of each wall. Note any variations.
For window and door casings, measure the opening width and height. Check for square by measuring diagonal corners, they should be equal.
Plan your trim layout on paper first. Sketch the room showing all openings, electrical outlets, and built-ins. Mark where trim will meet and how corners will join. This prevents surprises during installation.
Craftsman Door and Window Casing: Installation Steps
Door and window casing is the most visible trim in a room. Getting it right makes the difference between a professional look and an amateur one.
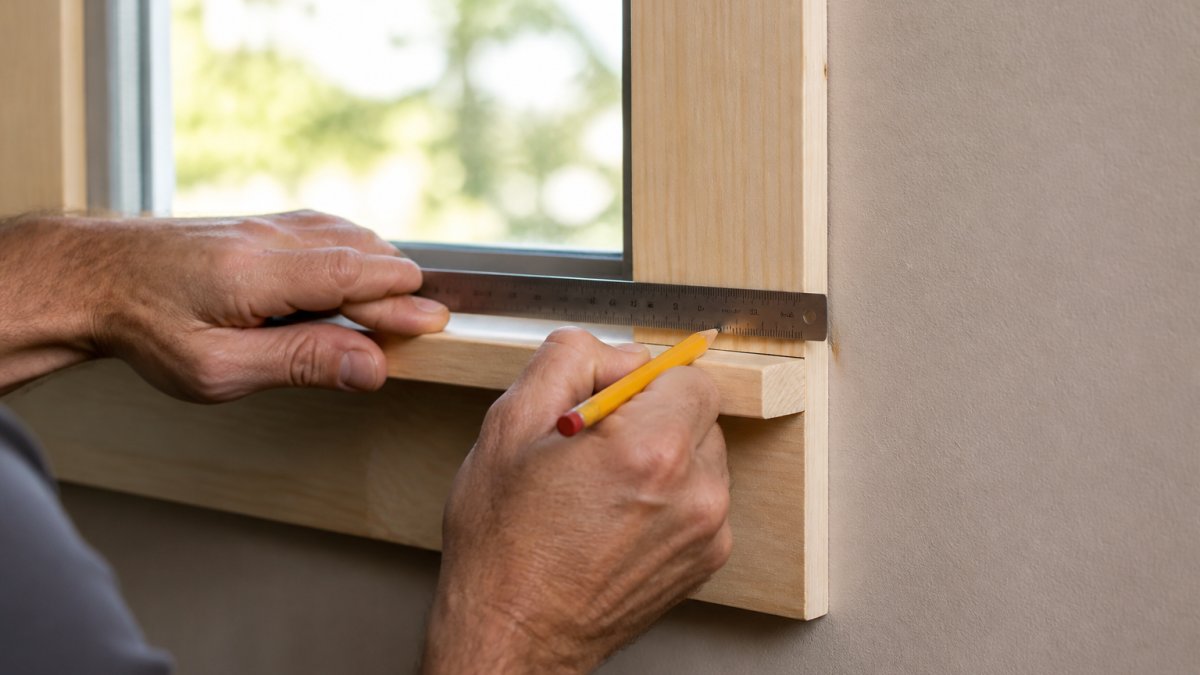
Step-by-Step Casing Installation
The process follows a logical sequence. Rushing any step creates problems later.
Step 1: Prepare the opening. Remove old casing if present. Clean the wall around the opening.
Step 2: Cut the head casing. Measure the opening width.
Step 3: Install the head casing. Apply construction adhesive to the back.
Step 5: Set all nails. Use a nail set to drive nails slightly below the surface.
Step 6: Fill and sand. Fill nail holes with wood filler that matches your finish.
Handling Trim Profiles and Proportions
Craftsman trim proportions follow specific rules. The casing width should relate to the opening size. For a standard 3-foot-wide window, use 3.5-inch-wide casing. For a 4-foot opening, use 4-5 inch casing.
The profile, the shape of the trim when viewed from the side, matters too. Craftsman casings typically have:
- A simple, beveled edge (not ornate)
- Consistent depth from front to back
- A small reveal (usually 1/4 inch) where the casing meets the frame
This reveal is important. It shows the frame thickness and adds visual interest. Mark it with a pencil before installing trim to keep it consistent.
Restoring Original Wood Trim: Repair and Finishing
Original trim that's been painted, damaged, or neglected needs careful restoration. The goal is to repair without replacing.
Request a Project Consultation →
Repairing Damaged or Painted-Over Trim
Paint buildup is common on old trim. Multiple layers can hide beautiful wood underneath.
For minor paint buildup: Use a heat gun and putty knife. Work carefully to avoid scorching the wood.
For heavy paint: Chemical strippers work faster but require ventilation and protective equipment. Follow product instructions carefully.
Once stripped, inspect the wood. Small dents and dings are normal and add character.
Fill small gouges with wood filler. For larger damage, use epoxy wood filler that you can sand and stain.
Check for rot by probing with a screwdriver. Soft or crumbly wood indicates rot.
Choosing Craftsman Color Palettes and Finishes
Craftsman homes used specific color schemes. Understanding them helps you make authentic choices.
Common Craftsman colors:
- Earthy tones: olive green, warm taupe, ochre, rust
- Creamy off-white and ivory
- Deep browns and warm grays
- Natural wood finishes
These colors complement the wood rather than hiding it. They age gracefully and feel warm to the eye.
Finish options:
- Natural finish: Stain and clear coat. Shows the wood grain. Requires maintenance.
- Paint: Solid color covers the wood. Easier to maintain than stain.
- Milk paint: Period-appropriate option that creates a softer, aged appearance.
Test your finish choice on a hidden area first. Stain color looks different on different woods. Paint sheen affects how the trim looks in various lighting.
Essential Craftsman Trim Tools and Equipment
The right tools make installation faster and produce better results. You don't need expensive equipment, but quality matters.
Hand Tools vs. Power Tools for Trim Work
Essential hand tools:
- Hammer (16-ounce finish hammer for trim work)
- Nail set (to drive nails below the surface)
- Putty knife (for filling and scraping)
- Chisels (1/4, 1/2, and 1-inch sizes for detail work)
- Handsaw (for detail cuts power tools can't make)
- Measuring tape (25-foot minimum)
- Combination square (for marking and checking angles)
- Level (4-foot for checking plumb and level)
Power tools that help:
- Miter saw (for accurate crosscuts and angles)
- Table saw (for ripping boards to width)
- Orbital sander (for smoothing surfaces)
- Brad nailer (for small trim pieces)
- Drill (for pilot holes and driving screws)
Power tools save time but require skill to use safely. Hand tools give you more control, especially on detail work.
Safety and Precision Equipment
Protect yourself while working. Safety equipment prevents injuries that slow your project.
- Safety glasses (always)
- Hearing protection (when using power tools)
- Dust mask (when sanding or stripping paint)
- Work gloves (for handling rough wood)
- Knee pads (for kneeling during installation)
Precision equipment ensures quality results:
- Stud finder (to locate framing for nail placement)
- Moisture meter (to check wood moisture before finishing)
- Caulk gun (for construction adhesive)
- Clamps (to hold trim while glue dries)
Common Mistakes to Avoid in Craftsman Trim Renovation
Learning from others' mistakes saves time and money. These are the problems we see most often.
Mistake 1: Using the wrong materials. Finger-jointed pine looks cheap and doesn't age well.
Mistake 2: Skipping surface preparation. Painting over dirt or old finish causes adhesion problems.
Mistake 4: Inconsistent nail spacing. Nails every 16 inches keep trim straight and prevent cupping.
Mistake 5: Neglecting the reveal. That small gap between the casing and the frame is intentional.
Mistake 7: Over-sanding original trim. Original surfaces have character. Light sanding is enough. Don't sand away the patina.
Planning Your Craftsman Trim Project: Timeline and Next Steps
A successful trim project requires realistic planning. Understanding the timeline helps you budget your time and resources.
Project timeline varies by scope. A single room with new trim might take a few weeks from start to finish, including drying time.
Break the project into phases:
- Planning and material selection
- Preparation and removal
- Installation
- Finishing (stain or paint)
Trim work often connects to larger renovation projects. If you're planning kitchen remodeling or bathroom remodeling, coordinating trim work with those projects ensures a cohesive design throughout your home.
If you're tackling this yourself, start with a single room. Learn the techniques on less-visible trim before moving to main living areas.
Craftsman trim restoration brings your home's authentic character to life.
Frequently Asked Questions
How do you do Craftsman-style trim?
Craftsman trim emphasizes natural materials, clean lines, and visible joinery. Start by selecting quarter-sawn oak, Douglas fir, or reclaimed wood. Install baseboards, headers, and window casing with proper proportions (typically 6-12 inches tall depending on ceiling height). Use mortise-and-tenon joinery where visible, sand smooth, and finish with matte or satin stain to highlight the wood grain. The key is letting the material and craftsmanship speak rather than ornate decoration.
Can original Craftsman trim be restored instead of replaced?
Yes. Original trim is often worth restoring. Strip paint carefully using chemical strippers or sanding, repair water damage or gaps with wood filler, and refinish with period-appropriate stain or paint. Many homeowners find that original trim, even when damaged, has superior wood quality and character that new trim cannot replicate. Professional restoration preserves your home's authenticity and historical value.
What mistakes should you avoid when updating Craftsman trim?
Avoid over-sanding, which removes original patina and detail. Don't use hollow-core or finger-jointed trim, solid wood is essential. Skip ornate crown molding that contradicts Craftsman simplicity. Never paint over original stained wood without understanding its historical significance. Don't rush installation; Craftsman trim demands precise measurements and square cuts. Finally, avoid mixing too many wood species or finishes in one room, which breaks the cohesive aesthetic.
How do you choose trim profiles for a Craftsman renovation?
Craftsman profiles are typically simple, with minimal ornamentation. Look for quarter-round, chamfered, or beveled edges rather than complex molding. Baseboards usually run 6-12 inches tall; window and door casing is typically 3-6 inches wide. Measure your ceiling height and room proportions, larger spaces accommodate taller trim. If replacing trim, match the original profile whenever possible. Consult period-appropriate trim catalogs or work with a contractor experienced in Craftsman homes to ensure authenticity.
